Hello crochet friends…
What are you up to? Can you believe it… We are already halfway through the CAL 😀. So week 3 of Let’s Mingle CAL features the shell stitch with a twist, where I have added some light texture to the pattern. If you are new to crochet and want to explore some advanced beginner options, this is a good place to start.
Modified Shell Stitch:
As always, we are starting our sample square with 35 foundation chains. If you want to do the chainless foundation row option, then you need to start with a row of 34 chainless half double crochet stitches (you can find the tutorial here).
Similar to the Rain Drop pattern, your tension is important to keep your work flat; otherwise, your work will tend to curl to one side if you pull tightly.
New to the CAL? Never too late to join 😊. Here are the links to previous patterns:
Disclaimer: This CAL project is NOT by any means sponsored by any social media platform or yarn company. All patterns are my own design and copyright to Erini’s Corner.
You can sell finished items made of these patterns. Please give credit to Erini’s Corner with the original design. Any reproduction of the written patterns, video tutorials and photos either mechanically, electronically or through photocopying is NOT permitted.
Posts may contain affiliated link. I get a small commission, at no extra cost for you, on your purchases.
Hello everyone and welcome back! I have a new simple pattern for you today. I always like to wear my own handmade poppy.
Last year, I made one following a YouTube pattern and this year I decided to come up with my own. I hope you enjoy it!
As always, you can find the video tutorial right here.
For the material, you will need a small amount of black and red yarn, size 4 mm crochet hook, a pair of scissors and a tapestry needle.
Puff stitch is made by yarning over, inserting the hook into the stitch, yarn over and pull a loop. Repeat 2 more times for a total of 7 loops on the hook. Yarn over and pull through all 7 loops then chain 1 to finish the stitch.
Puff Set: Into the same stitch, crochet a puff stitch (explained above), ch 1, puff stitch.
We will start by doing a magic ring using the black yarn. Round 1(Black yarn): Into the magic ring, sc x 10, sl st to join using the red yarn (10 sc) Round 2 (Red yarn): Ch 1, *sc into the same st where you did the sl st, puff set into the next st *. Repeat *__* 4 more times, sl st to join. (5 sc, 5 puff sets) Round 3 (Red yarn): Ch 1, *sc into the same st where you did the sl st, puff st, puff set into the ch 1 sp, puff st*. Repeat *___* 4 more times, sl st to join (5 sc, 10 puff sts, 5 puff sets)
Terms: If you intend to sell projects made from my free patterns you find on my YouTube Channel (Erini’s Crochet Corner), Instagram account or blog, I would appreciate it if you link it back to any of my accounts on social media. Thank you and happy crocheting 🙂
I have recently come across a photo of a very rich and textured knitted pattern. I have done some knitting when I was young but it was only the basics; knitting and purling and never learned how to read a knitting diagram.
And so I decided to challenge myself to crochet it instead. I haven’t done this before and after several trial and errors and lots of frogging, I am now ready to introduce the Blossom crochet pattern to you.
Unfortunately, most of my stash is of weight 4. I am sure that if it’s done with a DK, the outcome will be even better.
So let’s get started with the pattern. A video tutorial is available here
Abbreviations: Ch: Chain Hdc: Half double crochet Bpdc: Back post double crochet Fpdc: Front post double crochet Popcorn: 5 double crochet stitches into the same stitch, take the hook out of the loop, insert the hook into the first double crochet stitch, pull the loop through and chain 1
For one repeat as shown in the video tutorial, start by chaining 17 foundation chains;
Row 1: Ch 1, turn, hdc into the 2nd chain from hook, hdc x 16 Row 2: Ch 1, turn, hdc x 2, bpdc x 2, sk 2 sts, fpdc x 2, fpdc x 2 around the posts of the skipped sts (working them behind the posts of the previous 2 fpdc sts), popcorn, skip 2 sts, fpdc x 2, fpdc x 2 around the posts of the skipped sts (working them infront of the posts of the previous 2 fpdc sts), bpdc x 2, hdc x 2 .. Refer to the video tutorial at 4:49 for illustration. Row 3: Ch 1, turn, hdc x 2, fpdc x 2, bpdc x 2, hdc x 5, bpdc x 2, fpdc x 2, hdc x 2 Row 4: Ch 1, turn, hdc x 2, bpdc x 2, fpdc x 2, hdc, popcorn, hdc, popcorn, hdc, fpdc x 2, bpdc x 2, hdc x 2
In the video, I worked row 5 just for the fact that in row 2 we were working around hdc posts throughout the row while in row 4 we have front and back posts stitches already made and we will be working around these posts. Otherwise the repeat of stitches is still the same.
Now, if you want to make more than one unit side by side, you need to change the foundation chain to a multiple of 15 + 2. The pattern will be followed as explained earlier until you reach the last 2 stitches (hdc x 2 at the end of each row) which will be skipped.
Terms: If you intend to sell projects made from my free patterns you find on my YouTube Channel (Erini’s Crochet Corner), Instagram account or blog, I would appreciate it if you link it back to any of my accounts on social media. Thank you and happy crocheting 🙂
Hello everyone. I saw the Japanese knot bags on Pinterest and wanted to give it a try in crochet. I decided to go with pumpkin colors since we are getting closer to Thanksgiving here in Canada and lots of fellow crocheters are looking for new Fall / Thanksgiving themed projects. You can definitely try it in any color you want. I find this bag really helpful when you are on the go and wanting to have your mask and hand sanitizer handy during pandemic.
Unfortunately, I couldn’t find cotton yarn in orange and green before shooting the video so in the tutorial, you will find me working with acrylic yarn. If it’s your first time crocheting bags and wondering about the material to be used, acrylic yarn has a stretch in it and that’s why it’s always advisable to either use cotton yarn or if you will got with acrylic then you need to add a lining to your bag.
I have written the directions for 2 sizes; the small one (featured in the video tutorial) and the bigger size. The pattern starts off the same for both then changes take place in round 5; as highlighted below.
For the handles, you will find 2 different numbers with one (between brackets for large size bag).
Gauge: N/A
Yarn: Cotton yarn of weight 4 (Orange and green) or your yarn of choice
Hook: 4 mm or hook size to match your yarn choice
Stitches Used: (US Terms)
Double Crochet 2 Together (Dc2tog): Yarn over, insert the hook into the stitch, yarn over and pull a loop through the stitch, 3 loops on the hook, yarn over and pull through 2 loops only, yarn over, insert the hook into the same stitch, yarn over and pull a loop through the stitch, 4 loops on the hook, yarn over and pull through 2 loops, 3 loops on the hook remaining, yarn over and pull through all 3 loops.
Notes:
–The pattern is written for 2 different sizes, small and large.
–The chain 1 at the beginning of each row is NOT considered a stitch.
–At the end of each round / row, the total number of stitches will be mentioned between brackets
–(No) Stitch name (e.g. 2 dc): Means 2 double crochet stitches in the same stitch i.e. increase
–Stitch name x (No) – e.g. dc x 3: Means one double crochet stitch into each of the next 3 stitches
–I used the invisible decrease method as explained in the video (11:40).
Abbreviations:
Ch: chain
St(s): stitch(es)
DC: double crochet
DC2TOG: double crochet 2 together (explained above) Rep: repeat Rd: Round RS: Right side Sc: Single crochet Sc2tog: single crochet 2 together (used the invisible decrease)
Sl St: Slip stitch St: Stitch
WS: wrong side
Pattern:
Using color 1, create a magic ring.
Rd 1: Ch 1, dc x 12 (12)
Rd 2: Ch 1, 2dc into each st (24)
Rd 3: Ch 1, *2 dc, dc2tog*. Repeat *__* till the end, sl st to join (36) Rd 4: Ch 1, *dc2tog x 2, 2dc *. Repeat *__* till the end, sl st to join (48)
** For the small size bag**
Rd 5: Ch 1, dc2tog across the whole rd. Sl st to join. (48) Repeat Rd 5 till you finish Rd 12.
Switch to color 2 Rd 13: Ch 1, *sc x 2, sc2tog*. Repeat *__* till the end, sl st to join (36) Rd 14: Ch 1, sc across the rd. Sl st to join. (36)
***For the large size bag *** Rd 5: Ch 1, *dc2tog, 2dc, dc2tog x 2*. Repeat *__* till the end, sl st to join (60) Repeat Rd 6 till you finish Rd 15.
Switch to color 2
Rd (16): Ch 1, *sc x 3, sc2tog*. Repeat *__* till the end, sl st to join (48) Rd (17): Ch 1, sc across the rd. Sl st to join (48) Short Handle: Row 1: Ch 1, sc x 7 (8) Row 2: Ch 1 , turn, sc x 7 (8) Repeat row 2 till you reach a length of 8” (9”). Cut off the yarn, leaving a long tail to sew the handle to the other side of the bag. Turn the bag inside out, working on the WS, start attaching the handle to the other side. Please refer to the video (16:58) for where to join the handle.
Long Handle:
Turn the bag inside out again. Now we are back to the RS. Lay your bag flat and pick the stitch on the other opposite side of where you started the short handle. Join you yarn and repeat the same steps done of the short handle, till you reach a length of 10” (15”). Sew the other side to the bag.
And now the bag is ready. Insert the long handle into the short one and your bag is closed. Terms: If you intend to sell projects made from my free patterns you find on my YouTube Channel (Erini’s Crochet Corner), Instagram account or blog, I would appreciate it if you link it back to any of my accounts on social media. Thank you and happy crocheting 🙂
Welcome to this week’s free pattern. As we are getting nearer to Fall, I felt that’s a good time to share my braided messy bun beanie pattern. The pattern is beginner friendly so if you haven’t worked with braids and color changes before, don’t worry. Everything is explained in details in the video if you need any demonstration.
The video tutorial covers the steps for a messy bun beanie. In the written pattern below, I have added 2 more rounds in case you want to convert it to a closed beanie.
Yarn: Worsted yarn or your yarn of choice
Hook: 5.5 mm hook size for an adult size beanie.
Notes:
–The chain 1 at the beginning of each row is NOT considered a stitch.
–At the end of each round / row, the total number of stitches will be mentioned between brackets
–(No) Stitch name (e.g. 2 hdc): Means 2 half double crochet stitches in the same stitch i.e. increase
–Stitch name x (No) – e.g. hdc x 3: Means one half double crochet stitch into each of the next 3 stitches
–I used the invisible decrease method as shown in the video 31:15.
–For a smaller or bigger size beanie, use the same stitch count below with a smaller or bigger hook size.
Abbreviations:
AC: Accent color
Ch: Chain
Hdc: Half Double Crochet
MC: Main Color
Pr: Previous
Rep: Repeat
Rs: Right Side
Sc: Single Crochet
Sc – blo: Single crochet into the back loop only
Sc – flo: Single crochet into the front loop only Sc2tog: single crochet 2 together (decrease)
St(s): Stitch(es)
Pattern:
Brim:
Using MC
Ch 10
Row 1: Sk 1st st from the hook, sc x 9(9)
Row 2 – 46: Ch 1, turn, sc-blo x 9 (9)
At the end of row 46, bring the 2 short edges together, ch 1, * insert the hook into the flo of the pr row and the rem loop of the foundation chain and sl st to join both sides *. Rep*__* 8 more times. (9 sl st)
Turn the work inside out. Now we will work around the long edge of the brim. This is now the RS.
Beanie Body:
Using MC
Round 1: Ch 1, sc into the 1st st, sc x 8, 2 sc, *sc x 9, 2 sc *. Rep *__* 2 more times. Sc x 6. Sl st to join. (50)
Round 2: Ch 1, hdc into the 1st st, hdc x 4, ch 7, sl st into the 1stch, *hdc x 5, ch 7, sl st into the 1st ch*. Rep *__* 8 more times . Sl st using AC(10 ch 7 loops, 50 hdc)
Round 3: Ch 1, sc x 50. Sl st using MC(50)
Repeat rounds 2 and 3 four more times.
Round 12: Ch 1, hdc x 50. Sl st using AC(50)
Before starting round 13 braid your loops as shown in video 25:03.
Round 13: Ch 1, * sc x 4, insert the hook into the loop of round 10 then sc*. Rep *__* 9 more times, sl st using MC. You can now cut off AC.
Round 14: Ch 1, *sc x 3, sc2tog*. Rep *__* 9 more times, sl st to join(40)
Round 15: Ch 1 , *sc x 2, sc2tog*. Rep *__* 9 more times, sl st to join (30)
Round 16: Ch 1, *sc, sc2tog*. Rep *__*9 more times, sl st to join(20)
At this point, you can fasten off for a messy bun beanie.
For a closed top beanie; Round 17: Ch 1, sc2tog x 10, sl st to join (10) Round 18: Ch 1, sc2tog x 10, sl st to join. Fasten off and sew the opening closed.(5)
Terms: If you intend to sell projects made from my free patterns you find on my YouTube Channel (Erini’s Crochet Corner), Instagram account or blog, I would appreciate it if you link it back to any of my accounts on social media. Thank you and happy crocheting 🙂
I jumped over the pocket shawl wagon and made my own pattern. I didn’t like the idea of chaining over a hundred stitches to start so I had to figure out a pattern that is worked width-wise. I used different stitches (each explained slowly in the video) so if you are a beginner you will find it easy to follow. And before I leave you with the pattern, I want to thank each and everyone who took the time to write me on Facebook, Instagram and YouTube. Your comments are the reason why I keep doing what I’m doing. Take care, stay safe and crochet on 😊.
Gauge: N/A
Yarn: Worsted yarn or your yarn of choice. I used 2 skeins of Bernat Premium for the body and less than half a skein for the pockets.
Hook: 7 and 8 mm or hook size to match your yarn choice
Stitches Used: (US Terms)
Special Stitch (SpS): Skip the next ch 1 space and the following stitch and work 2 double crochet stitches into the next ch 1 space. Next, insert the hook into the skipped ch 1 space and work one double crochet, making sure that when you pull the loop it is going around the 2 double crochet you just made. For illustration, refer to the video at 4:41
Abbreviations:
Bpdc: Back Post Double Crochet
Bptr: Back Post Treble
Ch: Chain
Dc: Double Crochet
Fpdc: Front Post Double Crochet
Fptr: Front Post Treble Crochet
Hdc: Half Double Crochet
Pr: Previous
Rep: Repeat
Rs: Right Side
Sc: Single Crochet
Sc – blo: Single crochet into the back loop only
Sc – flo: Single crochet into the front loop only
SpS: Special Stitch (refer to stitches used section)
St(s): Stitch(es)
Ws: Wrong Side
Shawl Body:
Size: 45 x 125 cm
Notes:
–The shawl is worked from one short side of the rectangle to the other. The foundation chain determines the width of it. The rows determine the length of the rectangle.
–This pattern can be customized to the width of your choice by chaining a multiple of 4 + 1.
–The chain 1 at the beginning of each row is NOT considered a stitch.
–Front Post Double Crochet (Fpdc): It is worked around the post in the previous row.
Pattern:
Using 8 mm hook, chain 53 (≈ 45 cm) Row 1: Ch 1, into the 2nd ch from hook work hdc, hdc into each st across. Row 2: Ch 1, turn, hdc into the 1stst, ch 1, sk 1 st, hdc, *ch 1, sk 1 st, hdc *. Repeat *__*. You should be ending the row with hdc st. Row 3 (RS): Ch 1 turn, hdc into the 1stst. *Work SpS into the following two ch 1 spaces, fpdc around the next st *. Repeat *__* until you have two ch 1 spaces remaining. Work SpS around the last 2 ch1 sp then 1 hdc into the last st. Row 4 (WS): Ch 1 turn, sc, ch 1, sk 1 st, *sc, ch 1, sk 1 st, bpdc, ch 1, sk 1 st *. Repeat *__* till you have one st remaining, sc into the last st. Repeat rows 3 & 4 till you reach the required length. Row before the last: Working into the ch 1 spaces of previous only, 2 hdc into each sp till one st is remaining, hdc into the last st. Count your stitches and make sure you have the same number of stitches you started your shawl with.
Last row: Ch 1 , turn, hdc into each stitch across. Fasten off.
Pocket (Make 2):
Size: 24.5 x 19.5 cm each
Notes:
–All odd number rows are worked as row 1
–Front Post Treble (FpTr): This stitch is worked around the front post stitch 2 rows below.
Pattern:
Using 8 mm hook, chain 23 (To make a bigger or smaller pocket, chain a multiple of 4 +3) Row 1 and all odd rows: Ch 1, hdc into the 2nd ch from hook and into each st across. Row 2 (RS): Ch 1, hdc into the 1st st, fpdc around the hdc of pr row, *hdc into the next 3 sts, fpdc*. Repeat *__* till you have one st remaining, hdc into the last st. Row 4: Ch 1, turn, hdc into the 1st st, fptr, *hdc into the next 3 sts, fptr*. Repeat *___* till you have one st remaining, hdc into the last st. Repeat rows 1 and 4 till you reach the height you want. Then switch to 7 mm hook. Row before last: Ch 1, turn, sc-flo into each st across. Last row: Ch 1 , turn, sc – blo into each st across. Fasten off leaving a long tail to sew the pocket to the shawl.
To position you shawl pocket for sewing, please refer to the video at 30:55
Terms: If you intend to sell projects made from my free patterns you find on my YouTube Channel (Erini’s Crochet Corner), Instagram account or blog, I would appreciate it if you link it back to any of my accounts on social media. Thank you and happy crocheting 🙂
Hello everyone, Let’s take a break from all the news going around us and focus on something positive. What are the projects you are currently working on?
This week, I decided to work on a decoration project for my kid’s room. I did him a project a couple of years ago. I was trying myself in embroidery. It was my first and last embroidery project 😎 to be honest, but what melts my heart is that he still cherishes it till this day. That makes me think that no matter how you see yourself unworthy and imperfect, you are always flawless in the eyes of someone who loves you.
Back to our project and since we are all advised to limit going out, I had to work with the supplies I had at home. A while ago, I got a small black canvas (I was probably thinking of working small doilies and mounting them on the canvas, but this project never saw the light) 😏. And thankfully, about 3 weeks ago I was at Michael’s and got some Bernat Handicrafter Cotton yarn. So I was set pretty quick on this project.
My son draw me some flowers and butterflies and I started crocheting them. He chose the layout to be vertical. He also wanted to add a 🌞 but there was no room for it. He is now asking for another canvas to go on the opposite side of this one; something on my to do list once we are allowed to go out again.
If you are more of a visual person, I have a YouTube video explaining the project step by step.
Otherwise, here is the written pattern (US terms) for both flowers and the butterfly. I used 4.5 mm hook. I apologize for not taking pictures as I worked this project but I promise I will make sure to take pictures of each step in the coming projects. Abbreviations: ch: Chain st(s): stitch(es) sc: single crochet sl st: slip stitch sc-blo: single crochet in the back loop only dc: double crochet
Blue Flower: – Start with a magic ring. – Ch 1, (sc x 3, ch 5) x 5, sl st into the first sc to join. – Sl st into the 2nd sc, skip the 3rd sc, (into the next chain 5 loop, sc x 11, sk next sc, sl st into the middle sc). Repeat (_) 4 more times. In the last sl st, switch to green yarn to start working the stem.
Stem: – Chain a foundation chain equal to the length of the stem you like (depending on the size of your canvas and where you want to place the flower). – Ch 1 to turn, skip 1 st, sc into each st back to the flower body. At the end sl st into the flower sc to secure the stem. Fasten off, leaving a long tail (used to sew the flowers on the canvas). Yellow / Orange Flower: – Start with a magic ring. – Ch 1, sc – blo x 6, sl st to join (6) – Ch 1, sc – blo x 2 into each st (12). If you wish to switch colors, you can add it in the sl st step. – Ch 1, (sc – blo x 1, 2 sc-blo into the next st). Repeat (_) till the end of the round (18). Sl st to join. – Ch 1, (2sc – blo x 1, sc – blo in the next 2 sts). Repeat (_) till the end of the round (24). Sl st using the green yarn.
For the stem, follow the same instructions for the blue flower. Butterfly: – Magic ring. – Ch 2, dc x 5, ch 2 and go into the magic ring and sl st (One wing is formed). Repeat these steps one more time for the second wing. – Over the ch 2 of the first wing, sl st twice to reach the top of the chains. In the next st make 2 dc, then dc x 3, in the last st make 2 dc, then ch 2 and into the ch 2 of the previous round, make 2 sl st to reach the magic ring again. Make a sl st into the ring. Repeat the same steps on the other wing. – For the antenna (if you decide to make it with a different color, sl st with the new color through the magic ring). – Rotate the butterfly 180 °, sl st over the sl st of previous round. – Ch 8, sk 2 sts, and sl st into the 3rd st and into each st back to the butterfly body. Repeat the same steps for the second antenna. Fasten off, leaving enough yarn to sew the butterfly to the canvas.
Now your project is ready to be assembled. Try different layouts before sewing.
Please let me know if you have any questions in the comments section.
CALs or Crochet Along Projects are just my favorite. I find myself learning a lot as I work on these projects. Although I love all the colors used in CALs, you can say I am a “less is always more” kind of person. My projects are always of 2 colors unless I’m working with a cake or variegated yarn. Currently, I am working on Rozetta, a project by Scheepje’s yarn. I was hesitant about it at the beginning. Don’t get me wrong, I loved the pattern but I wasn’t sure I would be committed to finishing it (you know how sometimes you lose your “crojo”). So I looked into my stash and found some Caron Simply Soft yarn. I tried the first part, which is made in tapestry crochet technique, and loved it. But, unfortunately, I didn’t have enough yarn to get me through and my local Michael’s seems to be discontinuing the brand.
So back to my stash again, I found 2, almost full, skeins of Pound of Love yarn by Lion brand from previous Christmas projects. So you guessed it right, red and green it is. I started earlier this year and was going pretty consistent with it but as it got bigger I found it hard to accomplish a lot in one day. A round would take an hour to finish. Currently, I am working on the corners which is part 8 of 11. Almost there 😃
Since we are in a lock down, I have high hopes to finish all my current WIPs and sort the rest of my stash 😎.
And speaking of lock down, I wish you and your family a safe stay at home.
My family is staying home as most of you. My LO is bored and at his young age, he can’t really comprehend why we are not allowed to go out and meet friends for play dates. He is definitely happy about the fact that there is no school for now but mommy is not 😌.
I had to find a way to get my mind off all the crazy stuff going around us these days and nothing can do this better than starting a new crochet project 🧶.
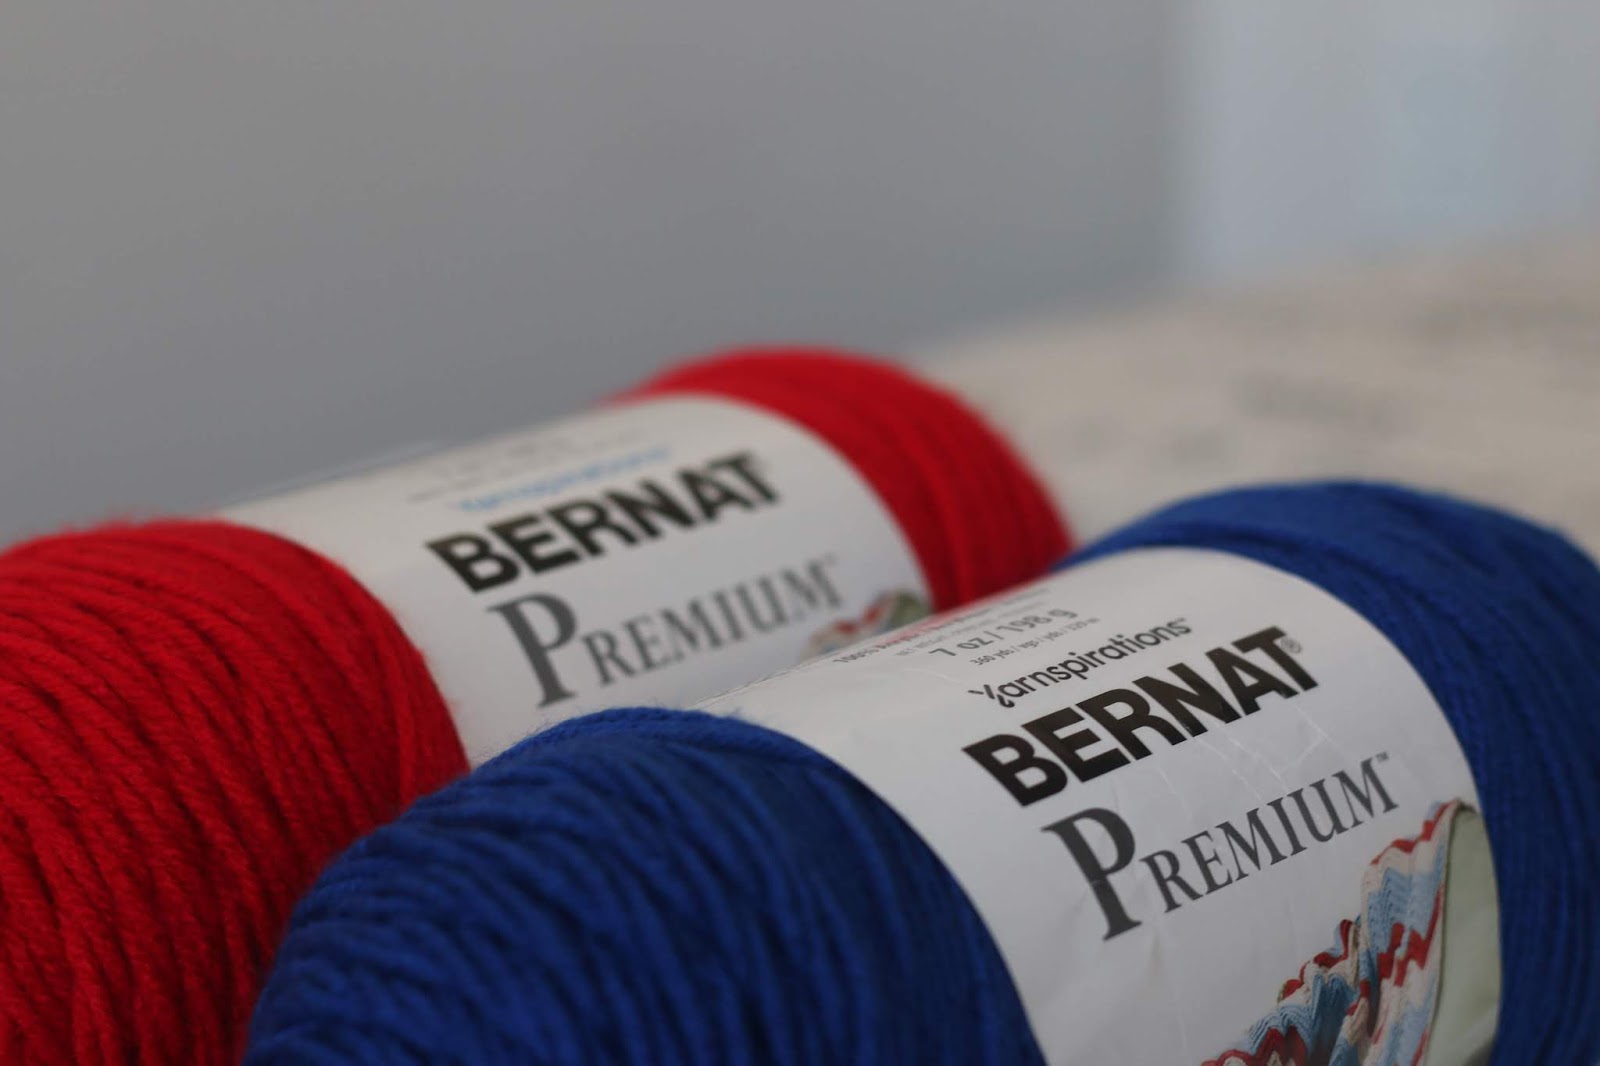
A while ago I bought Bernat® premium worsted yarn in coral blue and red based on my boy’s request to have a Spiderman-themed blanket. They have been sitting in my stash for sometime. So I decided to go on Ravelry and check some easy patterns.
I am not a big fan of working with dc stitches only.. it’s not my favorite stitch. But with all the stress we are going through, I didn’t want a pattern where I have to go check and read each row to move on. I was looking for something easy to memorize and can work it on when I’m half asleep at the end of the day.
I came across a superhero dream catcher afghan free pattern and decided to give it a try. I like how this is coming altogether. I enjoy working with Bernat® yarn; soft texture and reasonable price which is an important point to consider when working on big projects.
My current issue now is that I had bought a skein of each color and the pattern calls for 2 of each. I am done with the blue one and currently working the last couple of rows in red till I get more yarn. Now the question is; when will I be able to get out and buy more yarn?
Let’s pray this situation comes to an end soon. And I can’t leave without sending kudos to all the physicians, nurses, paramedics, researchers and grocery store employees who are out there working in such circumstances.